


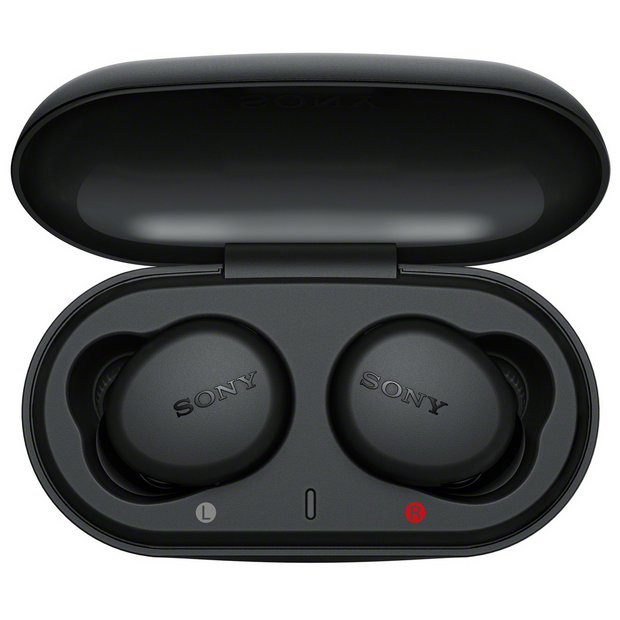
Sony WF-XB700 Extra Bass Wireless Headphones
START GUIDE
Wearing the headset
-
Insert the headset units into both ears.
Put the unit with the
 (left) mark on your left ear and the unit with the
  (right) mark on your right ear. The left unit has a tactile dot.
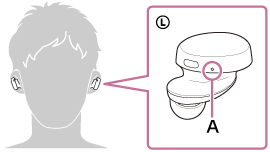
A: Tactile dot
-
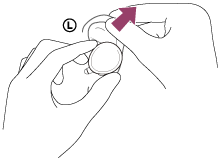
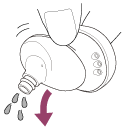
Twist the headset to slide the earbud deep into your ear.

Hint
- The earbud will be easier to slide deep into your ear if you pull up on the top of the ear lightly while twisting the headset.
If the earbuds do not fit your ears
M-sized hybrid silicone rubber earbuds come attached to the left and right units of the headset at the time of purchase. If the earbuds tend to come off or you feel that there is insufficient low frequency sound and a difference in volume between the left and right units, change the earbuds to another size to comfortably and snugly fit your left and right ears.
About the instruction manual video
Watch the video to find out how to change the earbuds and how to wear the headset on your ears.
https://rd1.sony.net/help/mdr/mov0017/h_zz/
Turning on the headset
When the headset is set into the charging case
-
Remove the headset from the charging case.
The headset turns on automatically and the indicators (blue) flash.
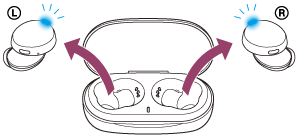
You will hear the voice guidance say, “Power on”.
When the headset is not set into the charging case
The headset turns off if pairing with the Bluetooth device is not established within 5 minutes or just after the headset is initialized. In this case, the headset will turn on by pressing and holding the buttons on both units of the headset for about 2 seconds. The headset will also turn on when it is set into the charging case and then removed from the charging case.
When the headset is turned on
When both units are removed from the charging case, the connection between the left and right units of the headset is established.The headset goes into Bluetooth pairing mode when turning on the headset for the first time after purchase or just after initializing the headset.
Turning off the headset
-
Set the headset into the charging case.
Put the left unit of the headset (the unit with the tactile dot) back into the left hole of the charging case, and put the right unit of the headset back into the right hole of the charging case. Each unit of the headset will be set to the correct position by the built-in magnet.
When the headset is set into the charging case, the headset will turn off automatically. When the remaining battery charge of the charging case is sufficient, the indicators (red) on the headset light up and the charging of the headset will start.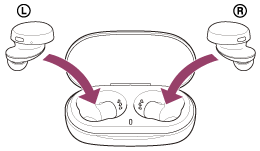
Note
- When the remaining battery charge of the charging case is not sufficient, the charging of the headset will not start. Charge the charging case.
What you can do with the Bluetooth function
The headset uses BLUETOOTH® wireless technology, allowing you to do the following.
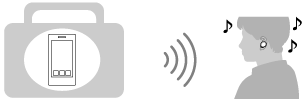
Listening to music
You can receive audio signals from a smartphone or music player to enjoy music wirelessly.
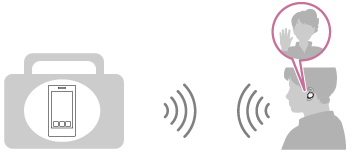
Talking on the phone
You can make and receive calls hands-free, while leaving your smartphone or mobile phone in your bag or pocket.
About the voice guidance
- When the headset is turned on: “Power on”
- When informing the remaining battery charge of the headset: “Battery about XX %” (The “XX” value indicates the approximate remaining charge. Use it as a rough estimate.) / “Battery fully charged”
- When the remaining battery charge of the headset is low: “Low battery, please recharge headset”
- When automatically turning off due to low battery of the headset: “Please recharge headset. Power off”
- When pairing mode is canceled automatically and the headset turns off: “Power off”
- When entering pairing mode: “Bluetooth pairing”
- When establishing a Bluetooth connection: “Bluetooth connected”
- When disconnecting a Bluetooth connection: “Bluetooth disconnected”
On water resistant performance of the headset
- The charging case is not water resistant.
- The water resistant specifications of this headset are equivalent to IPX4 in IEC 60529 “Degrees of protection against ingress of water (IP Code)”, which specifies the degree of protection provided against the entry of water. The headset cannot be used in water.
Unless the unit is used correctly, water may get into the headset and cause fire, electrocution, or malfunctions. Note the following cautions carefully and use the headset correctly.
IPX4: Protected against water splashing from any direction.
Liquids that the water resistant performance specifications apply to
| Applicable: | Fresh water, tap water, perspiration |
| Not applicable: | Liquids other than those above (examples: soapy water, detergent water, water with bath agents, shampoo, hot spring water, pool water, seawater, etc.) |
The water resistant performance of the headset is based on measurements performed by Sony under the conditions described above. Note that malfunctions resulting from water immersion caused by customer misuse are not covered by the warranty.
To maintain water resistant performance
Carefully note the precautions below to ensure proper use of the headset.
- Do not splash water forcibly into the sound output holes.
- Do not drop the headset into water, and do not use underwater.
- Do not allow the headset to remain wet in a cold environment, as the water may freeze. To prevent malfunction, make sure to wipe off any water after use.
- Do not place the headset in water or use it in a humid place such as a bathroom.
- Do not drop the headset or expose it to mechanical shock. Doing so may deform or damage the headset, resulting in deterioration of water resistance performance.
- Use a soft dry cloth to wipe off any water that gets on the headset. If water remains in the sound output holes, the sound may become muffled or completely inaudible. If this happens, remove the earbuds, position the sound output holes facing downward, and shake several times to get the water out.
- Turn the microphone hole downward and gently tap it about 5 times towards a dry cloth etc. If any water drops are left in the microphone hole, it may cause corrosion.

- If the headset is cracked or deformed, refrain from using the headset near water or contact your nearest Sony dealer.
Charging
The headset and the charging case contain built-in lithium-ion rechargeable batteries. Use the supplied USB Type-C cable to charge the headset before use.
-
Connect the charging case to an AC outlet.
Use the supplied USB Type-C cable and a commercially available USB AC adaptor.
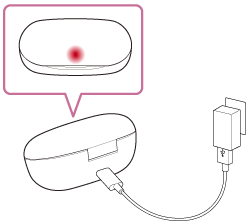
The indicator (red) on the charging case lights up, and the charging case starts charging.
-
Set the headset into the charging case.
Put the left unit of the headset (the unit with the tactile dot) back into the left hole of the charging case, and put the right unit of the headset back into the right hole of the charging case. Each unit of the headset will be set to the correct position by the built-in magnet.
The indicators (red) on the headset light up, and the headset starts charging.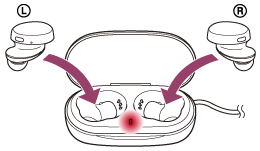
- Close the lid of the charging case after setting the headset into the charging case.
- After charging is complete, the indicators of the charging case and the left and right units of the headset turn off.
After charging is complete, disconnect the USB Type-C cable.
About the charging time
The required time for fully charging the left and right units of the headset is about 2.5 hours (*).
The required time for fully charging the charging case is about 3 hours (*).
*Time required for charging the empty battery to its full capacity. The charging time may differ depending on the conditions of use.
Charging the headset when you are outside
A rechargeable battery is built into the charging case. If you charge the charging case in advance, you can use it to charge the headset when you go out without a power supply.
If the charging case is fully charged, you can fully charge both the left and right units of the headset once at the same time.
Notes on charging the headset when you are outside
- When the headset is placed in the charging case, if the indicator (red) on the charging case flashes slowly, the remaining battery charge of the charging case is low. Charge the charging case.
- If the indicator (red) on the charging case does not turn on even when the headset is placed in the charging case, the battery charge of the charging case is empty. Charge the charging case.
System requirements for battery charge using USB
USB AC adaptor
A commercially available USB AC adaptor capable of supplying an output current of 0.5 A (500 mA) or more
Personal computer
Personal computer with a standard USB port
- We do not guarantee operation on all computers.
- Operations using a custom-built or homebuilt computer are not guaranteed.
Hint
- The headset can be also charged by connecting the charging case to a running computer using the supplied USB Type-C cable.
Checking the remaining battery charge
You can check the remaining battery charge of the rechargeable batteries of the headset and the charging case.
When you remove the headset from the charging case
When you remove the headset from the charging case, the voice guidance indicating the remaining battery charge of the headset can be heard via the left and right units of the headset respectively.
“Battery about XX %” (The “XX” value indicates the approximate remaining charge.)
“Battery fully charged”
The remaining battery charge indicated by the voice guidance may differ from the actual remaining charge in some cases. Please use it as a rough estimate.
When the remaining charge becomes low
If a warning beep sounds and the voice guidance says, “Low battery, please recharge headset”, charge the headset as soon as possible.
When the battery becomes completely empty, a warning beep sounds, the voice guidance says, “Please recharge headset. Power off”, and the headset automatically turns off.
When you are using iPhone or iPod touch
When the headset is connected to an iPhone or iPod touch over an HFP Bluetooth connection, it will show an icon that indicates the remaining battery charge of the headset on the screen of the iPhone or iPod touch.
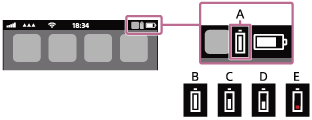
A: Remaining battery charge of the headset
B: 100% - 70%
C: 70% - 50%
D: 50% - 20%
E: 20% or lower (requires charging)
The remaining battery charge of the headset is also displayed on the widget of an iPhone or iPod touch running iOS 9 or later. For more details, refer to the operating instructions supplied with the iPhone or iPod touch.
The remaining charge which is displayed may differ from the actual remaining charge in some cases. Please use it as a rough estimate.
When you are using an Android™ smartphone (OS 8.1 or later)
When the headset is connected to an Android smartphone via HFP Bluetooth connection, select [Settings] - [Device connection] - [Bluetooth] to display the remaining battery charge of the headset where the paired Bluetooth device is displayed on the smartphone’s screen. It is displayed as “100%”, “70%”, “50%”, or “20%”. For details, refer to the operating instructions of the Android smartphone.
The remaining charge which is displayed may differ from the actual remaining charge in some cases. Please use it as a rough estimate.
Checking the remaining battery charge of the charging case
When you set the headset into the charging case or remove the headset from the charging case, if the indicator (red) on the charging case flashes slowly, the remaining battery charge of the charging case is 30% or lower. Charge the charging case.
Note
- The remaining battery charge may not be properly displayed if the headset has not been used for a long time. In this case, repeatedly charge and discharge the battery multiple times to properly display the remaining battery charge.